Phone photography or also known as Phonetography is becoming popular due to the powerful cameras being equipped on our smartphones nowadays.
One of the reason that I can think of is convenience and portability. You can’t fit a DSLR or even a mirrorless camera on your pocket right? Unless you have a pocket like Doraemon. So instead of carrying around traditional cameras or DSLRs, many chose to use phones to capture and preserve magical moments through photographs.
Another reason is that phones are cheaper plus they are always with us whether you admit it or not. It is now considered one of the basic necessities of human. Sometimes, we even have a mini heart attact when our phone is not in our pocket.
As an amateur, aspiring photographer and a certified phonetographer; I want to share some of the things I learned and being applied as I capture photographs.
1. KNOW YOUR CAMERA
Even if you’re using a DSLR or a Phone, you still need to know your equipment. You need to be familiarize with its specifications and features so that you’ll know its strength and weakness for you to adjust and adapt to it.
Tip: Google your phone’s specifications. Do not just rely on the Megapixel of the camera, that will just provide you with more details of the photograph. Check on the aperture size. It is being measured in (f) and it is fixed. Normal camera aperture are f2.2 and f2.0. However, there are also devices that has f1.8 (like my #LGG4) and f1.7 (Samsung S7 and S7 Edge) making it good for low light photography and provides greater Depth of Field which is good for portraits.
2. SHOOT IN MANUAL MODE
If you have this feature on your phone’s camera, use it. It is a great way to capture pictures. Seems complicated but once you get the hang out of it, you’ll never go back to Auto Mode.
Can you identify the icons on the picture? I’ll help you. Lets start at the top (L-R).
Histogram, White Balance, Auto Focus (AF), Exposure Value (EV), ISO Value(50), Shutter Speed (1/1723s) and aperture (f/1.8)
Bottom Part are all sliders so its easy to change setting. (L-R)
White Balance (WB), Manual Focus (MF), Exposure, ISO, Shutter Speed and Auto Exposure Lock (AE-L).
3. PHOTO COMPOSITION
These are rules or guides in photography to present your subject in a better way thus creating stunning photographs.
Here are some guides that I follow:
° Rule of Thirds
A basic rule and often used. The rule is to place your subject on the grid’s intersection.
° Framing
This composition method helps the viewer to focus on the subject.
° Depth
The depth is distance of the foreground or the subject from the background. It is the “blur” on the picture.
The bigger the aperture (f/1.7, f1.8), the greater the Depth of Field.
The narrower the aperture (f/22, f/11), the shallower the Depth of field.
Remember that these are only guides or rules and I’ll quote other photographers, “Rules are meant to be broken.” So do not rely on these rules. Learn to make your own style.
But keep in mind that if you break these rules, you must know why are you breaking them.
4. EDITING
After taking the pictures, it is still essential to do a post processing. Personally, I have 3 Editing apps that help me enhance my photographs.
° Snapseed

A powerful editing tool especially if you’re like me who shoots in RAW/DNG format to unlock the Develop feature on the app.
On this option, you can tweak to your hearts content. You can alter the Exposure Value (EV), White Balance/ Temperature which is measured in Kelvin (K), Contrast, Saturation, etc.
Here’s the develop option:
After editing the picture, you can even apply filters to enhance it more.
If you didn’t like the filter or the ourcome? No worries, you can re-edit. Instead of starting from scratch, you can retouch. Very convenient right?
°PIXLR

One of my favorite editing app. It can do simple adjustments like cropping, rotate, contrast, etc to complex like double exposure, effects, overlay etc. Above all the features, my favorite is History Brush.
You can apply a filter or style then remove/reveal details. I usually use this if I want a picture with Selective Color on it.
° PHOTO DIRECTOR

I’m still exploring this Photo editor but I know I will use this often to enhance my pictures. Its love at first install. Just like the other apps or software from Cyberlink, Photo Director has ton of amazing features that you can apply. I have tried the Preset Effects that can turn a simple to stunning photographs by just a tap of a finger.
Before:
After:
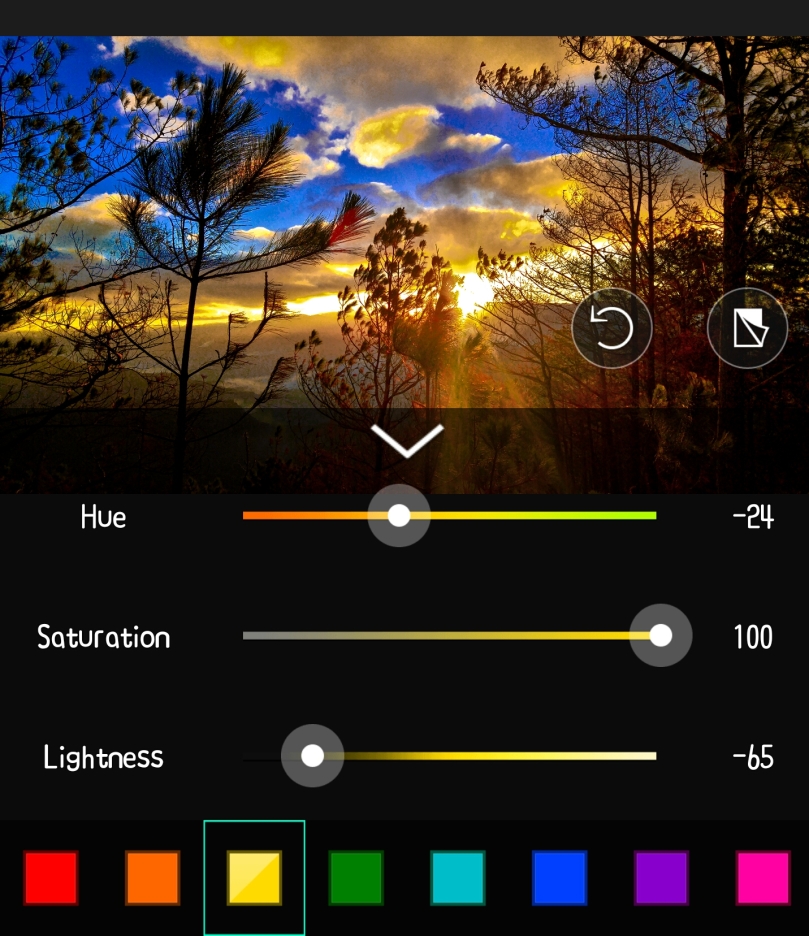
I’m also experimenting with the HSL feature wherein you can adjust the Hue, Saturation and Lightness of the colors on the Rainbow! Yes, ROYGBIV plus Pink! Isn’t amazing? Isn’t surprising? Isn’t it?
I’m not a natural in this field. I just love photography that I make an effort to be better.
I wrote this since my #LGG4 and I are now, 1 year. Thank you for being my partner. I learned a lot from you. I look forward for more stunning photographs.
By the way, are you also a Phonetographer? Do you have other tips that you can add? I’d love to read them on your comments below.


great content, very helpful
LikeLike